
*Preface and Prerequisites*
As much as I tried to develop the strategy so that it can be done regardless of Lunatic+ skills, it can’t completely mitigate them. I also maximized hit rates and while they’re high, they’re also often non-100. There’s two blows on a Barbarian that are critical to the strategy.
Anyway, the main issue is that Fred needs to be able to survive one hit each from the Myrm, Barb and Mage on the right (well, technically they could miss or Fred could get Dual Guarded, but I wouldn’t bet on that). Fred has 28 HP and will take the following levels of damage:
-Myrm with Vantage+ and Luna+ (VL-Myrm) will do 6.
-Myrm with any other skillset will do 0 because either his attack is too weak or he’s dead.
-Barb with Luna+ (L-Barb) will do 13.
-Barb with anything other than Luna+ will do 6.
-Mage with Vantage+ will do 11.
-Mage with Vantage+ and Luna+ will do 13.
-Mage with Vantage+ and Mag+2 will do 13.
-Mage with Vantage+, Mag+2 and Luna+ (VLM-Mage) will do 15.
-Mage without Vantage+ will do 0 because he’s too dead to attack.
What this comes down to is the enemy requiring very specific skill combinations to kill Fred, so it’s a pretty low chance (but we all know how that can go). Even with VLM-Mage and a VL-Myrm on their team, Fred can survive with 1 HP. The biggest issue is L-Barb, who more than doubles his damage. He and VLM-Mage will kill Fred exactly. VL-Myrm in tandem with L-Barb will also cause any Vantage+ Mage to kill Fred. If either of these enemy setups are present, it may be better to old strat where Fred solo kills the left Myrm and weakens the two Barbs (however, odds will still be poor because of the presence of L-Barb and a Vantage+ Mage).
Crits are also a possibility, thanks to the nature of Gamble and Elthunder’s bonus. Technically, all four characters working together can negate 15 or more crit, but the team doesn’t have the luxury of quadruple-teaming every enemy that has high crit. That’s why this guide will try to minimize the amount of attacks the enemy gets, in general.
Note that this guide was made with +Spd/-Skl, but any build should be able to do it. Hit rates may change a bit if Skl or Luk are chosen as an Asset/Flaw.
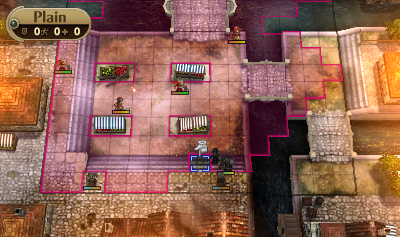
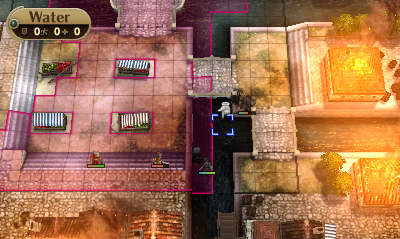
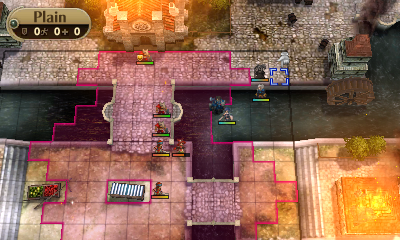
Turn 1
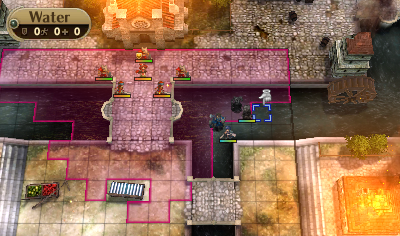
-Move Robin all the way right and attack the Myrm. It doesn’t matter if this hits, but it’s free WEXP and possibly EXP (Credit to Czar_Yoshi for this).
-Unequip Chrom.
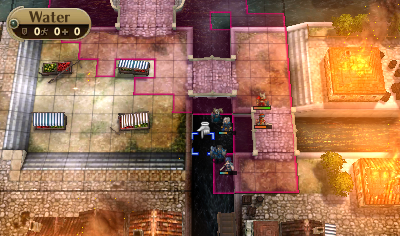
-Pair Fred to Chrom, move Chrom below the lowest Myrm, swap and kill with Fred (100 hit; 99 if the enemy has Avoid+10).
-There is a gap near the start 3 tiles below the bottom-left market stand that all enemies can’t reach. Put Lissa there.
-Enemy phase: Barb attacks Fred. Fred can counter for 24 (86 hit). If this misses, the run is in trouble. Mage will move south. Second Myrm will move into attack range while the Barb will move within range of Lissa.
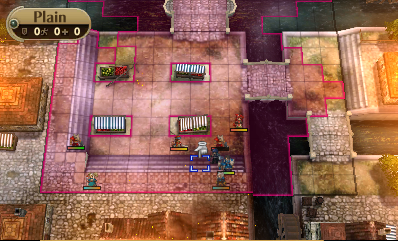
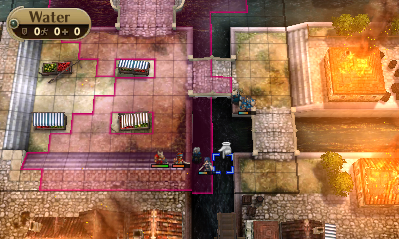
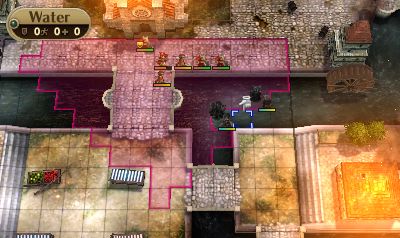
Turn 2
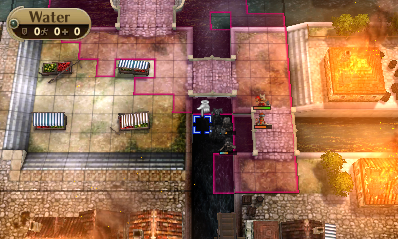
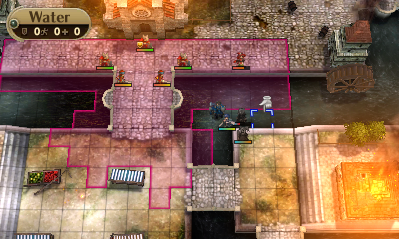
-Move Lissa all the way right and pair onto Robin.
-Move Robin right of Fred and transfer for Chrom. Switch, equip Chrom with the Rapier, then switch back to Robin. Attack the Barb with Thunder for the kill (84 hit, 33% Dual Strike). If this misses, hopefully Chrom dual strikes. If not, the run is in trouble.
-Move Fred north of Robin. Trade away Chrom’s swords (Credit to Czar_Yoshi for this). Attack the Mage for the kill (100 hit).
-Enemy phase: Myrm attacks Robin for 9 (vs 8 Def; 90 hit). Barb gets closer.
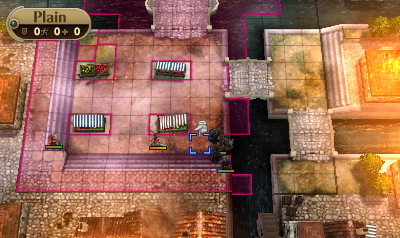
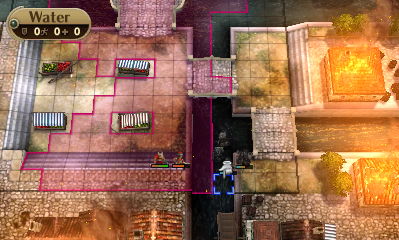
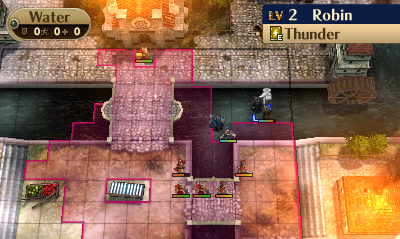
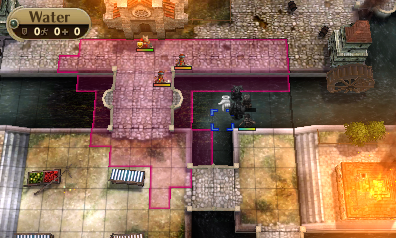
Turn 3
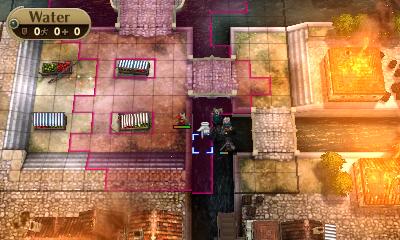
-Move Robin right into the water and swap to Chrom. Unequip him—both of them together do enough damage to kill the Myrm, so a dual strike would give the Barb an opening to pummel Chrom’s (very likely) wounded face.
-Move Fred across the east bridge so that he’s on the corner between both bridges.
-Enemy phase: Myrm attacks Chrom. Barb moves west of Myrm. Note that the Barb will often do this even if Fred would be in attack range from the Myrm’s north side—that Barb really hates Chrom. Sometimes the Barb will actually cooperate and go north of the Myrm, though. If that’s the case, you can skip the entire Dealing With the Barb section, as it’s easy enough to manipulate him back onto the upper bridge by having Chrom move to the left shore for a turn.
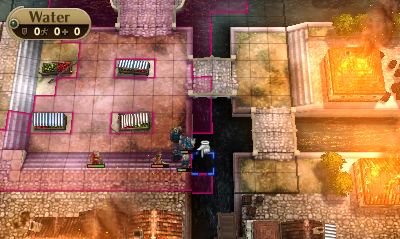
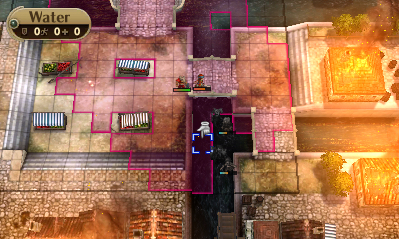
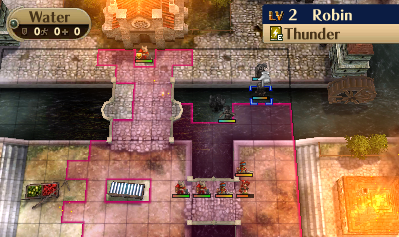
Turn 4
-Move Chrom east. Drop Robin north of him.
-Move Fred to the right of Chrom. Transfer Lissa to Chrom.
-Enemy phase: Myrm moves onto bridge with Barb right behind him.
Turn 5
-Transfer Lissa from Chrom to Robin.
-Trade Chrom back his swords. Unequip Fred, then pair him onto Chrom.
-Move Robin north.
-Enemy phase: Myrm and Barb both move onto the second bridge.

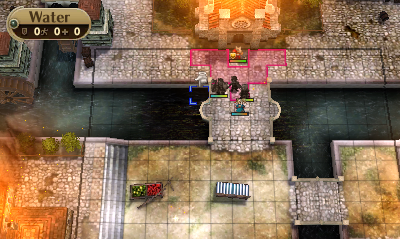
Turn 6
-Move Chrom north. Transfer Fred to Robin for lower Mag; this allows the Myrm (and Barb) to be milked for an extra hit each (thanks to Czar_Yoshi for pointing that out). Both enemies can no longer target anything, so they’ll stay put.
-The Myrm will be in range of Robin. Blast him until he’s dead.
Dealing With the Barb Turn 1
-Once the Myrm is dead, dealing with the Barb can still be a bit scary if he has Luna+ and/or Gamble. This guide will assume he has both (as well as the Myrm having Luna+ and hitting Chrom for 11 and Fred being down to 1) and work to minimize risk.
-Transfer Fred back to Chrom
DWB Turn 2
-Move Chrom left and drop Fred
DWB Turn 3
-Move Chrom right
-Move Fred 7 tiles left
DWB Turn 4
-Move Fred 2 tiles left
DWB Turn 5
-Move Fred 7 tiles right
DWB Turn 6
-Move Fred 2 tiles right, 3 tiles up, then 2 tiles right
-Move Chrom right

DWB Turn 7
-Pair Fred onto Chrom
-Move Chrom left
-Have Robin snipe the Barb
The Rest of the Map
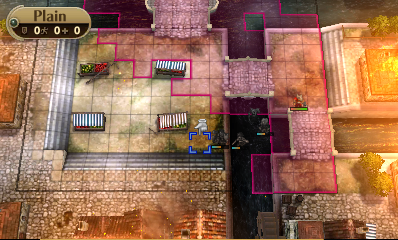
-More water will be used to fight the second wave. A lot of people will be familiar with this trick because Interceptor discovered it some time ago. However, I have made a few tweaks that economize Vulneraries. Give Robin all of them anyway, just in case she gets into trouble.
-Enter the right side of the moat. The formation of this is important because it gives Chrom/Fred a safe spot away from the Mage. Position them one up, three right and two down from the rightmost Myrm. Position Robin/Lissa one up, two right from Chrom.


-Note that the reason Robin can get away with toggling up and down to drop Lissa (and do so indefinitely, I might add) is that Chrom buys an extra turn by not swapping until the Mage has him within attack range. The Mage will generally prefer to go after him because he’s closer, except when the cycle brings Robin closer. This means that for every cycle, Lissa will do two heals (20 HP total) and Robin will face as much as 17 damage (if the Mage has both Mag+2 and Luna+). Therefore, no Vulneraries need be used to fight even the toughest variation of the Mage.
-Because of the way the rope-a-dope arranges the enemies, the Myrms will likely be positioned such that they can’t be lured into targeting ranged without taking damage. So Chrom will probably have to put himself in harm’s way. Chrom is preferred over Fred, since he can lure while still being in the water and move immediately out of range the next turn. Just don’t have anything equipped, because the last thing he needs is a crit or dual strike to let both Myrms attack him (he’ll die from the combined damage if both have Luna+). Transfer Fred to Robin for attacking the melee (make sure to give Fred back to Chrom for any turn he uses to lure the Myrms in), as this can once again result in getting extra hits for a bit more EXP.
-For the boss, pair Chrom (un-equipped to maximize EXP, as he and Robin should have fought near each other or paired enough to cap out support points for the map) to Robin and sit with Thunder at 2 range with Fred and Lissa both adjacent. Heal as necessary, moving Robin out of range for extra heals if needed (usually against Luna+). Don’t worry, the boss is nice and patient enough to sit around and wait.
-Overall, this should consistently get Robin enough EXP to hit level 7 plus some change, as well as attain the max amount of Chrom (plus both Fred and Lissa) support points, all with as low risk and little regard for Lunatic+ skills as possible.
